
How to Frame a Canvas Panel: The Complete Guide
When you’re looking to frame a canvas panel, there are many things to consider. What style of frame do you want? What color? How big should the frame be? In this complete guide, we’ll answer all of those questions and more. We’ll also provide some tips on how to make the framing process as easy and stress-free as possible. So whether you’re a first-time framer or an experienced pro, read on for all the information you need!
How to Frame a Canvas Panel in a Plein Air Frame
For those who want to exhibit their paintings outside, plein air frames are an excellent option. They are designed to protect the painting from the elements and can be left up all year round.
First, you will need to gather your supplies. You will need:
- A canvas panel
- Picture hanging hardware
- A plein air frame
- Wire or string
- A hammer
- Nails or screws
- L brackets (optional)
Then, follow these steps:
Step One: Place the canvas panel inside the frame. If the panel is too big or too small for the frame, you can trim it down to size with a utility knife.
Step Two: Use wire or string to secure the panel to the back of the frame. Make certain that the wire or string is tight so that the panel will not move around inside the frame.
Step Three: Attach picture hanging hardware to the back of the frame. You can use nails or screws for this step.
Step Four: Hang your framed canvas panel on a wall using L brackets (optional).
This method is simple and effective, and it will protect the painting from the elements.
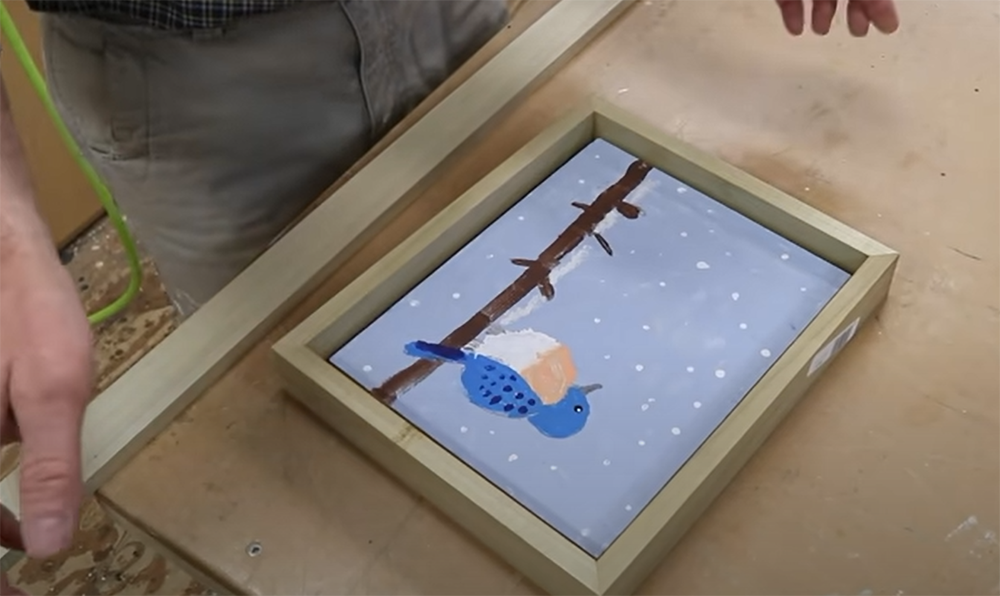
How to Frame a Canvas Panel With a Traditional Frame
Measure the dimensions of the panel and then cut the frame pieces accordingly. Next, use a miter saw to cut the corners of your frame at a 45-degree angle. Once that’s done, sand down the edges of your frame so that they’re nice and smooth.
Now it’s time to assemble your frame. To do this, you’ll need some wood glue and clamps. Apply a generous amount of glue to each end of one of your frame pieces and then join it together with another piece at a 90-degree angle. Repeat this step until all four sides of your frame are assembled.
Once it is assembled, it’s time to attach it to the panel. To do this, simply flip the panel over so that the back is facing up and then center the frame on top of it.
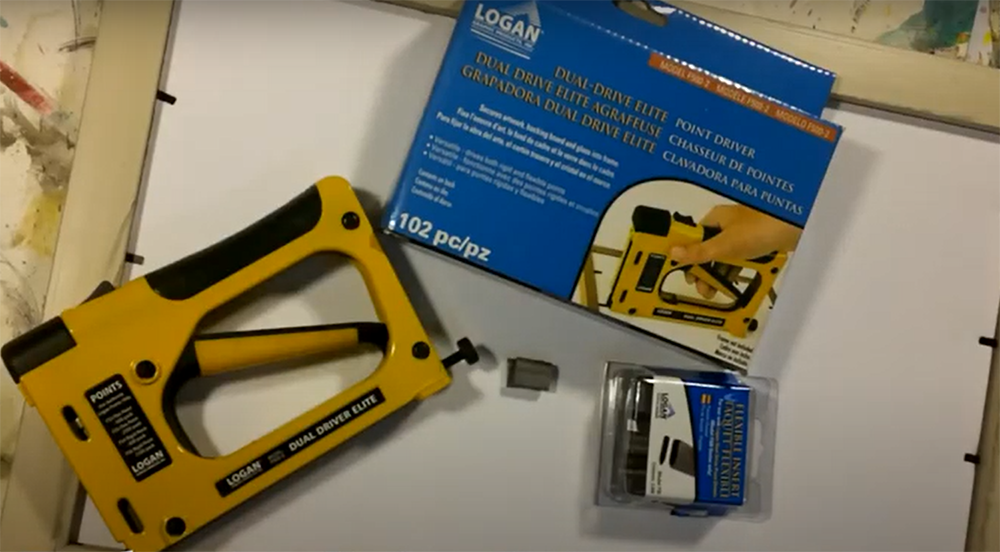
Secure the Panel to the Frame With a Point Driver
It’s time to begin stapling after the panel is in place. Stapling is the most popular approach to attaching a canvas panel to its frame, and it’s also simple. You’ll need a point driver for this part, which is a small hand-held tool that looks like a miniature screwdriver. It has a thin shaft with a sharp point on the end, perfect for driving staples into the wood.
Start by holding the point driver against the edge of the canvas panel where it meets the frame. When you’re stapling, hold the piece against the surface of the wood and push down on it with your other hand. Be sure not to press too hard or you could damage the canvas. Repeat this process every few inches until you’ve gone all the way around the perimeter of the panel.
Now is a good time to check that the panel is secure by giving it a little shake. It should be snug in the frame with no wiggle room. If it feels loose, add a few more staples until it’s tight.
Removing the Canvas Panel From the Frame
A frame will almost always have a means of detaching the canvas panel from the structure. This is usually done by unscrewing the frame’s backing board. Once you have removed the backing board, you can then gently pull the canvas panel out of the frame. If your frame does not include a tool for removing the canvas panel, you’ll have to cut it out.
Once you have removed the panel from the frame, you will need to remove the old frame backing material. To do this, you will need to use a sharp utility knife or a razor blade. Gently score the old backing material all around the perimeter of the canvas panel. Once you have scored the entire perimeter, you can then peel away the old backing material.
With the old backing material removed, you are now ready to add your new frame backing material. For this step, we recommend using a self-adhesive fabric adhesive. This type of adhesive will provide a strong hold and will also help to prevent any future wrinkles in your canvas panel. Apply a generous amount of adhesive to the back of your new piece of frame backing material. Then, carefully align the new backing material to the back of the canvas panel. Once you have aligned the new backing material, gently press it into place.
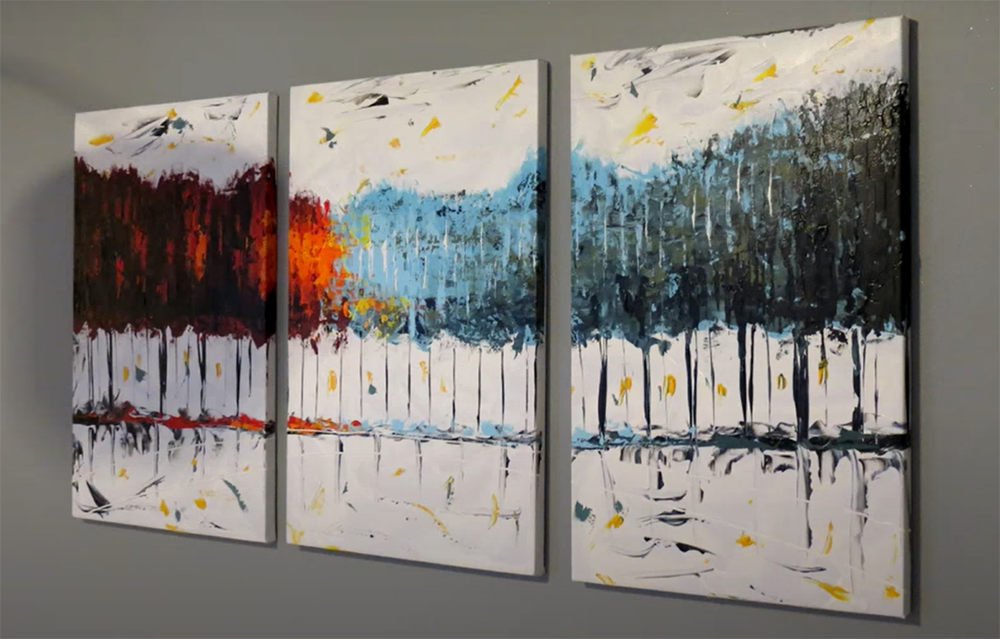
How to Frame a Canvas Panel in a Floater Frame
A floating frame can give your canvas panel a finished appearance and protect it from harm. Floater frames are available in a variety of styles and can be custom-made to fit your canvas panel perfectly.
Supplies and Equipment
- Tape measure
- Ruler or a straight edge
- Utility knife or box cutter
- Stapler
- Nails or picture hangers
- Floater frame (can be custom made or bought pre-made)
- Hammer
Optional: saw if you are cutting your own lumber for the frame.
First, use a tape measure to determine the dimensions of your canvas panel. You will need these measurements to order a custom frame or to select a pre-made frame that is the right size. Next, use a ruler or straight edge to mark out where you will cut the wood for your frame. If you are using pre-made molding, you can skip this step. Cut the lumber to size with a saw if you are making your own frame or have pre-made molding that needs to be cut to size.
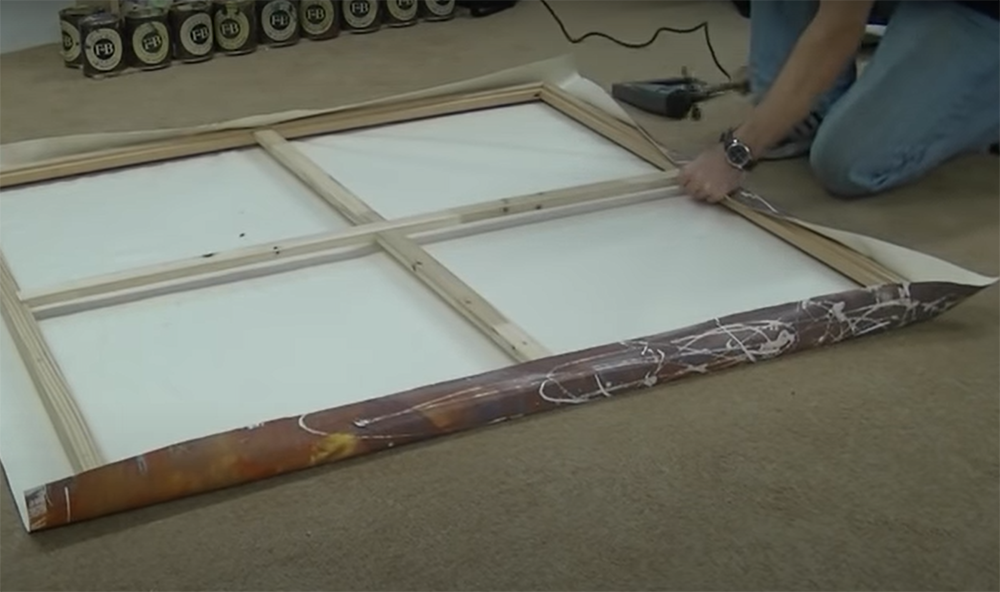
Assemble the frame by attaching the pieces of wood together at the corners using a stapler, hammer, and nails or picture hangers. If you are using a custom-made floater frame, follow the instructions that come with it. Place your canvas panel inside the frame and secure it in place.
Attach the spacers to the back of the panel
- Spacers
- Construction adhesive
- Caulk gun
The final step is to attach the spacers to the back of the panel. This will create a space between the panel and the wall, allowing the panel to “float” in the frame. Spacers come in a variety of sizes and can be purchased at most hardware stores. Select spacers that are slightly smaller than the thickness of your frame so they will be hidden when viewed from the front. Apply construction adhesive to the back of each spacer using a caulk gun. Press the spacers onto the back of the panel, spacing them evenly around all four sides.
Attach the Panel to the Floater Frame
Then, using a panel to match the floater frame, attach it. This can be done using construction adhesive and a caulk gun. Apply a generous amount of adhesive to the back of the frame, being sure to cover all four sides evenly. Press the frame onto the back of the panel, making sure that it is centered and level. Let the adhesive dry for 24 hours before continuing. That’s it!
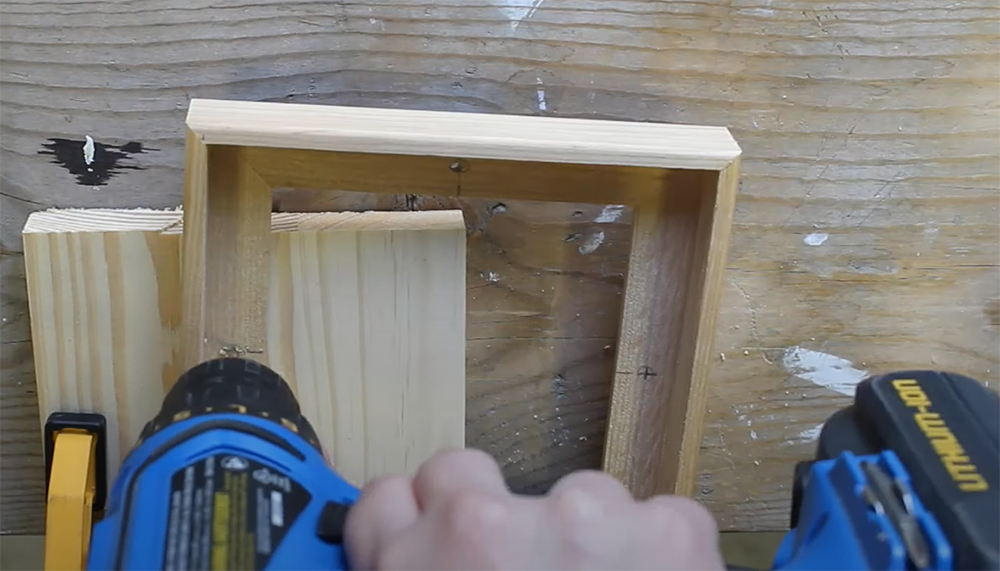
Drill Pilot Holes for the Screw Eyes
The next step is to make pilot holes for the screw eyes using a hand drill. YBefore you attach the frame to the wall, you’ll want to leave a bit of room to work. Use a drill bit that is slightly smaller than the screws you’re using for the screw eyes. Drill two holes into each side of the frame, about an inch or so from the top and bottom. You’ll want to make sure you have adequate pilot holes for the screws.
Now that you have your pilot holes drilled, it’s time to attach the screw eyes. Start by inserting a screw eye into each of your pilot holes. Make sure that the screw eye is flush with the surface of the frame, then tighten it in place with a screwdriver. Repeat this step for the remaining pilot eyes.
The frame should now have four screw eyes attached to it, two on each side.
It’s time to connect the wire now that you have your screw eyes in place. Make a note of the length of the picture hanging wire you’ll need to reach from one screw eye to another. Connect the wires together and twist them about each other to keep them in place. Trim any superfluous wire, then give the frame a gentle tug to ensure that the cable is firmly fastened.
Attach the Wire to the Frame
An extension wire should be cut to reach from one screw eye to the other. Thread the wire through each of the screw eyes, then twist it around itself to secure it in place.
The frame should now be fully assembled and ready to hang on the wall. Hang it up using nails or picture hangers, then stand back and admire your handiwork! A canvas panel may be framed to give any room in your house a touch of refinement.
Attach the Rubber Pads to the Back of the Frame
The last stage is to attach the rubber pieces to the back of the frame. You may put this over the area where the frame will rest on your wall. You’ll want to make sure that it’s thick enough so that it doesn’t scratch or move when hung up on your wall. Peel off the backing and press the rubber pads into place. [1]
How do you hang a canvas panel without a frame?
The answer is straightforward: you don’t. Canvas panels are meant to be used without a frame, and many artists choose to display them this way. There are several reasons for this: first, it allows the painting to be seen in its entirety; second, it gives the painting a more contemporary look; and third, it’s less expensive than framing.
If you do decide to frame your canvas panel, there are a few things you need to keep in mind. First, make sure the frame is properly secured to the back of the panel so that it doesn’t fall off or become loose over time. Second, use acid-free matting or mounting board to protect the painting from contact with the glass. And finally, make sure the frame is large enough so that it doesn’t overwhelm the painting.
So don’t be afraid to experiment and see what works best for you and your paintings.
Is it better to frame a canvas painting?
The simple answer is, it depends. There are a few things you need to consider before making the decision to frame or not to frame your canvas painting.
Another consideration is cost. A good quality frame can be quite expensive, and if you’re not careful, it can end up costing more than the painting itself! Before spending any money on framing, make sure you do your research and know exactly what kind of frame will best complement your piece.
Lastly, you need to think about the environment in which the painting will be hung. If it’s in a high-traffic area or somewhere with lots of natural light, you might want to consider framing to protect the painting from damage.
If you’re still not sure whether or not to frame your canvas painting, take some time to look at other paintings similar to yours that are already on display. This can give you a good idea of what will work best for your particular piece.
Is it expensive to frame a canvas?
Here are some tips on how to frame a canvas panel:
- Choose the right size frame. The frame should be slightly larger than the canvas so that it does not overwhelm the painting.
- Consider using an inexpensive wood or metal frame. These frames are easy to find and relatively inexpensive. You can also find them in a variety of styles to match your decor.
- Use high-quality materials. When framing a canvas, it is important to use high-quality materials. This includes using acid-free matting and backing, as well as UV-resistant glass or acrylic.
- Hang the framed canvas panel in a prominent place. A framed canvas panel makes a great addition to any room in your home. Hang it in a place where it will be seen and admired by all who enter.
Do you have to stretch a canvas to frame it?
No, you don’t have to stretch a canvas to frame it. You can simply frame the canvas panel without stretching it first. However, if you do choose to stretch the canvas, we recommend that you use an acid-free adhesive and staple the edges of the stretched canvas onto the back of the frame. This will help to prevent the fabric from sagging over time.
If you’re not sure whether or not to stretch your canvas, consider these factors:
- The size of the painting: If the painting is small (less than 16″ x 20″), it’s probably not necessary to stretch it first.
- The type of paint used: If you used oil or acrylic paint on a cotton or linen canvas, it’s a good idea to stretch the canvas first. This will help to prevent the paint from cracking as the fabric expands and contracts over time.
- The artist’s intention: If you’re not sure whether or not the artist intended for the painting to be stretched, it’s always best to err on the side of caution and stretch it first.
Keep in mind that stretching a canvas is a bit of an art form in itself. If you’re not confident in your ability to do it correctly, we recommend taking it to a professional framer or gallery. They’ll be able to stretch it correctly and help you choose the right frame for your painting.
Once you’ve decided whether or not to stretch your canvas, you’re ready to choose a frame. There are a few things to keep in mind when choosing a frame for a canvas panel:
- The color of the frame should complement the painting, not compete with it.
- The width of the frame should be proportional to the thickness of the canvas panel. For example, if you have a thick (≥ ½”) canvas panel, you’ll want to choose a wider frame (≥ ¾”).
- The style of the frame should match the overall tone of the painting. For example, if the painting is formal and traditional, you’ll want to choose a more traditional frame. If the painting is whimsical and fun, you might want to choose a more playful frame.
FAQ
Can you put a canvas panel in a frame?
If the canvas panel is thin (between ⅛ and ¼ inch), you can put it in a frame. If the panel is thicker, it will need to be mounted on a rigid backing board before being framed.
Canvas panels are a great alternative to traditional stretched canvases. They’re lighter and more portable, so they’re ideal for plein air painting or for taking to art classes. Plus, they’re less expensive than stretched canvases, so they’re a great option for students or beginner painters.
If you do decide to frame your canvas panel, make sure to use acid-free tape or glue to adhere the panel to the backing board. This will prevent the panel from eventually warping or becoming damaged. [3]
What is the best way to frame a canvas painting?
This is a question that we get asked a lot, and there are actually a few different ways that you can go about it. The most important thing is to make sure that the frame you choose compliments the painting, and doesn’t take away from it.
One option is to use a floater frame, which will allow the sides of the painting to be visible. This can be a good choice if you want to keep the focus on the artwork itself.
Another option is to use a traditional picture frame, with matting if desired. This can give your painting a more finished look, and can also help to protect it from dust and damage. [4]
No matter which route you choose, make sure that you take the time to measure the painting and the frame before you make your purchase. You don’t want your beautiful new painting to arrive and find that it doesn’t fit in the frame!
What can I do with canvas panels?
Canvas panels are a great way to display your work if you’re an artist, photographer, or crafter. They provide a clean and simple way to show off your creations. You can use them for paintings, sketches, photography prints, and more. Plus, they’re easy to frame!
How do you display a flat canvas panel?
The easiest way to display a flat canvas panel is by using an existing frame. You can also use specialty hangers that are designed for displaying flat panels. If you’re looking for a more permanent solution, you can mount the panel to a board and then hang the board on the wall.
Another option is to create your own frame using wood strips. This method is more time-consuming but it will give you more control over the final look of your project. [5]
Make sure that the frame or hanger you use is appropriate for the size and weight of your canvas panel. Otherwise, your artwork could be damaged or even fall off the wall!
Useful Video: 3 Ways to Frame Canvas Panels
Conclusion
Framing a canvas panel is a simple and easy way to add protection and stability to your painting while also improving its appearance. With just a few supplies and some basic instructions, you can quickly and easily frame your own canvas panels at home. So grab your supplies and get started today! You’ll be glad you did. Thanks for reading!
References:
- https://drawandpaintforfun.com/3-ways-to-frame-a-canvas-panel/
- https://artradarjournal.com/paintings/canvas/how-do-you-frame-a-canvas-panel/
- https://www.logangraphic.com/learning-center/complete-picture-framing-guide/mount-frame-canvas-board.php
- https://www.framedestination.com/blog/picture-frames/how-to-frame-canvas-prints
- https://www.livingspaces.com/inspiration/ideas-advice/decor-tips/how-to-hang-canvas-art-without-frame