
Do you love the look of watercolor paintings, but don’t know how to create them yourself? In this blog post, we will teach you how to watercolor on fabric! This is a great way to add some color and personality to your clothes or home decor. We will provide you with a step-by-step guide, as well as some tips and tricks for creating beautiful watercolors. So what are you waiting for? Get started today!
Gather the Art Supplies for the Job
The first step is to gather all of the necessary supplies. For watercoloring on fabric, you will need:
- fabric paint
- a paintbrush or two
- a cup of water
- a piece of cardboard or newspaper (to protect your work surface)
- fabric to be painted (preferably something that is light-colored and made from natural fibers like cotton)
Once you have all of your supplies, you are ready to begin!
Prepare Your Paint
The key to successful watercoloring is in the brush. Before you start painting, you will need to prepare your brush. First, wet the bristles of the brush in the cup of water. Then, shake off any excess water and dip the brush into the fabric paint.
There are no rules when it comes to creating a watercolor painting. Just let your imagination run wild! Experiment with different techniques and see what works best for you. Here are a few ideas to get you started:
- To create a light color, use less paint on your brush. For a darker color, use more paint.
- You can create interesting patterns by letting the paint dry in between brushstrokes.
- To create a gradient effect, start with a light color and then add darker colors as you go.
Once you are happy with your painting, allow it to dry completely. Then, enjoy your new work of art!
How Paints Are Classified
Now that we know how to watercolor on fabric, let’s take a closer look at the different types of fabric paints. Fabric paints are classified according to their level of permanence. This is important to consider, as you will want to choose a paint that is right for the project you are working on.
Permanent fabric paints are great for items that will be washed frequently, like clothing. They are also ideal for projects that require bright and vibrant colors.
Semi-permanent fabric paints are perfect for items that will not be washed often, such as home decor. They provide good color saturation without being too intense.
Temporary fabric paints are best suited for projects that will only be used for a short period of time, such as costumes or party decorations. They are also a good choice for children’s projects, as they can be easily removed from fabrics. [1]
Designate Separate Water Containers for Wetting Paint and Diluting Fabric Medium
Designate 2 water containers when working with fabric paints – one for wetting the paint and one for diluting the fabric medium. You can use a cup or bowl for each container. Be sure to label the containers so you don’t accidentally mix them up.
To wet the paint, add enough water to cover the bottom of the container. Dip your brush into the water, then shake off any excess before adding paint to your brush. This will help to prevent your paint from drying out too quickly.
To dilute the fabric medium, add equal parts water and fabric medium to the container and mix well. Fabric medium is used to thin out fabric paints and make them more flexible. It also helps to increase the durability of the paint and prevents colors from bleeding.
*NOTE: Not all fabric paints require the use of a fabric medium. Please refer to the instructions on your particular brand of paint to see if fabric medium is necessary.
Protect Your Working Surface Using Freezer Paper
Freezer paper is a great way to protect your working surface when painting on fabric. Simply tape a piece of freezer paper to your table or countertop. The shiny side of the paper should be facing up.
When you are finished painting, simply peel off the freezer paper and throw it away. There is no need to worry about cleanup!
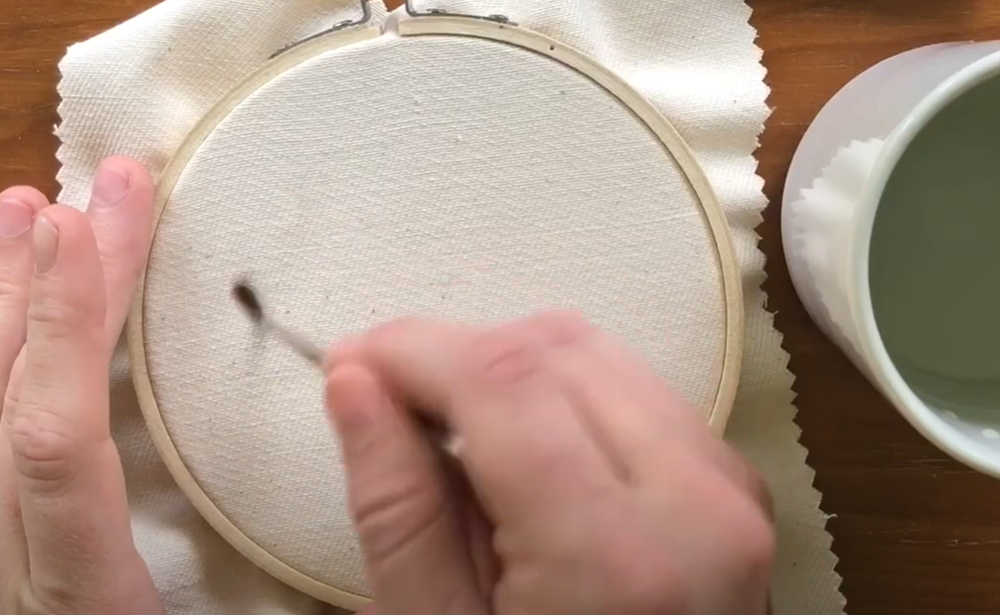
Experiment on a Small Fabric First
Before you start painting on your final fabric, it is always a good idea to experiment on a small piece first. This will help you to get a feel for the paint and prevent any mistakes.
To test your paint, start by wetting your brush in the water container. Then, dip the brush into the fabric paint and apply it to the fabric. Experiment with different techniques and colors to see what you like best. Once you are satisfied with the results, allow the paint to dry completely.
Trace Text on Fabric With a Permanent Marker
One easy way to add text to your fabric painting is to trace it on with a permanent marker. This is a great option if you are not confident in your free-hand abilities.
To trace text onto fabric, start by finding a font that you like. Print out the text at the desired size using a laser printer. Then, place the printed paper underneath your fabric and tape it in place. Use a sharpie or other permanent marker to trace over the text, being careful not to move the paper.
Once you have finished tracing, remove the paper and take a step back to admire your work!
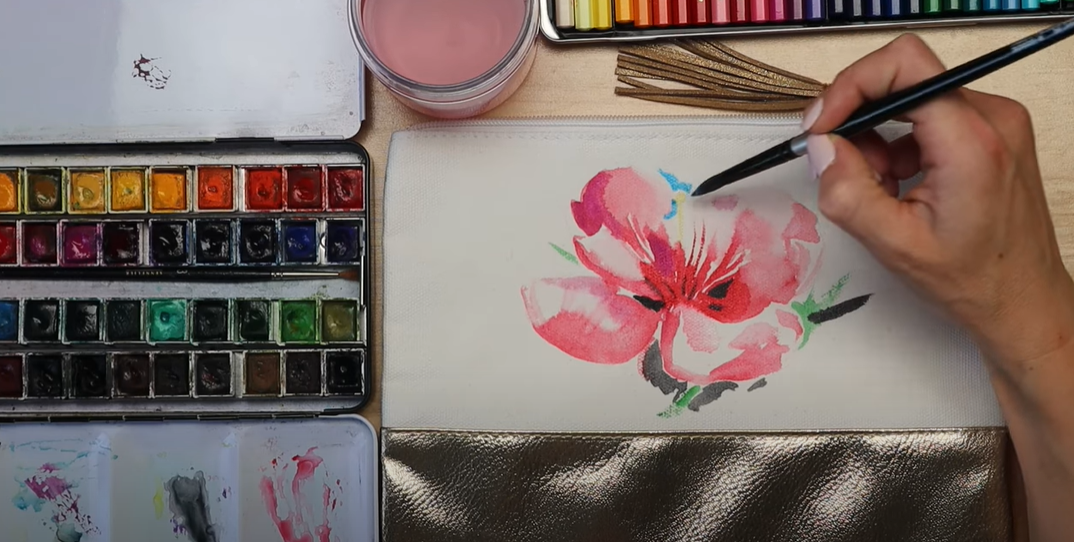
Apply Paint on Your Fabric
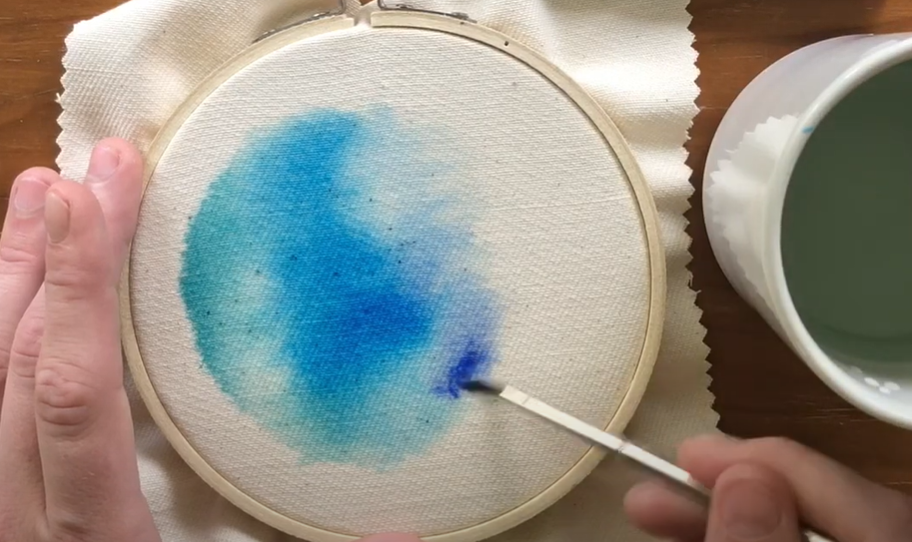
To apply paint to fabric, start by wetting your brush in the water container. Then, add paint to your brush and begin applying it to the fabric. Be sure to work in small sections so the paint doesn’t dry out before you have a chance to spread it.
Blend Colors on Fabric With Fabric Medium Mixture
One way to create beautiful blended colors on fabric is to mix a fabric medium solution with your fabric paints. To do this, simply add equal parts water and fabric medium to a container and mix well.
Then, using two different colors of paint, apply each color to opposite sides of your brush. Dip the brush into the fabric medium mixture, then apply it to the fabric in a sweeping motion. The colors will blend together beautifully!
Fabric Medium
To use fabric medium, simply add it to your fabric paints in a 1:1 ratio. For example, if you are using 1 cup of paint, add 1 cup of fabric medium. Mix well and then proceed with your project as usual.
Repeat Procedure for Any Other Color Fabrics in Your Setup
Once you have finished painting one color of fabric, repeat the entire process with any other colors that you are using. Be sure to allow each fabric to dry completely before moving on to the next.
When you are finished painting all of the fabrics, congratulations! You have successfully learned how to watercolor on fabric.
Heat Set Your Fabric
Once you have finished painting your fabric, it is important to heat set the paint. This will help to prevent the paint from cracking or peeling over time.
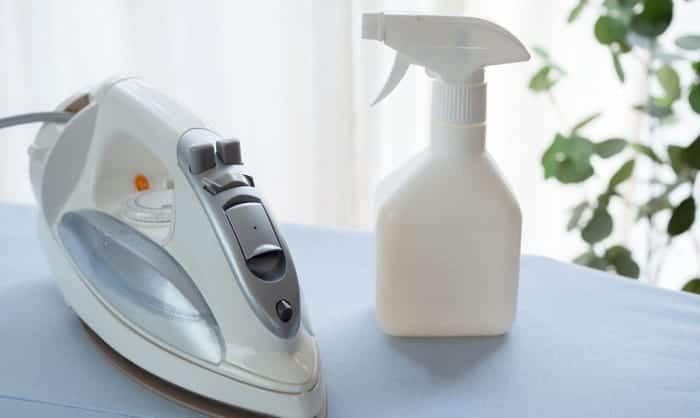
To heat set your paint, simply place your fabric in a clothes dryer on the highest heat setting. Allow the fabric to tumble for 30 minutes, then remove and allow to cool completely. Or you can use iron, the hottest temperature, with steam on the back of the fabric. Place a piece of parchment paper or an old towel over the design before ironing.
Four Basic Methods for Heat Setting Fabric Paint
There are four basic methods that can be used to heat set fabric paint: tumble drying, ironing, using a heat press, or using a hairdryer.
Tumble drying is the easiest method and only requires access to a clothes dryer. Simply place the painted fabric in the dryer on the highest heat setting and allow it to tumble for 30 minutes. Remove the fabric and allow it to cool completely before using.
Ironing is another easy method that only requires an iron. Place the painted fabric on an ironing board and cover it with a piece of parchment paper or an old towel. Set the iron to the hottest setting and steam over the entire design for 3-5 minutes. Once the fabric has cooled, it’s safe to use.
Using a heat press is the best method for ensuring that the fabric paint is properly heat set. However, it does require access to a heat press machine. Set the temperature of the machine to 350 degrees Fahrenheit and the timer for 3-5 minutes. Place the fabric on the platen and close the lid of the machine. When the timer goes off, remove the fabric and allow it to cool completely.
The final method is using a hairdryer. This is not the recommended method as it can be easy to overheat the fabric and cause the paint to crack or peel. However, if you don’t have access to any other methods, this will work in a pinch. Simply hold the hairdryer 6-8 inches away from the fabric and heat on high for 3-5 minutes. Move the hairdryer constantly to avoid overheating any one spot. Let the fabric cool before using. [2]
Ironing
Ironing is a great way to heat set fabric paint if you don’t have access to a tumble dryer or heat press. It’s also a quick and easy method that doesn’t require any special equipment.
To iron your fabric, simply place it on an ironing board and cover it with a piece of parchment paper or an old towel. Set the iron to the hottest setting and steam over the entire design for 3-5 minutes. Allow the fabric to cool completely before using.
Oven
The oven is not the recommended method for heat setting fabric paint as it can be easy to overheat the fabric and cause the paint to crack or peel. However, if you don’t have access to any other methods, this will work in a pinch.
To use the oven, preheat it to the lowest temperature setting. Place the painted fabric on a baking sheet and place it in the oven. Heat for 2 minutes, then remove and allow to cool completely.
Clothes Dryer
The easiest way to set fabric paint is by tumble drying it. All you need is a clothes dryer and 30 minutes. Put the painted fabric in the dryer on high heat, wait for 30 minutes, take out the fabric, let it cool, and use as desired!
Screen Printers’ Dryer
A screen printers’ dryer is a type of conveyor dryer that is often used to cure screens after printing. It can also be used to heat set fabric paint.
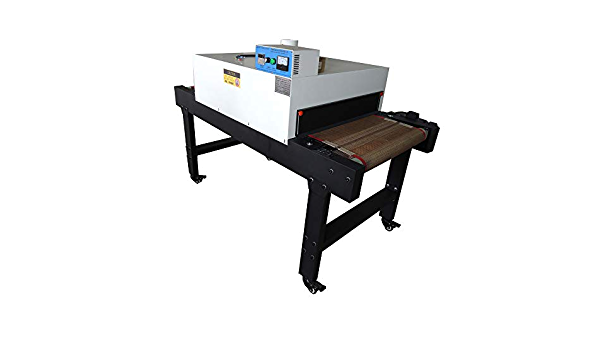
To use a screen printers’ dryer, simply hang the painted fabric on the conveyor belt and turn on the machine. Run the fabric through for 3-5 minutes. Remove the fabric and allow it to cool completely before using.
Washing Your Fabric
Once you’ve heat set your fabric paint, you can wash it just like any other piece of clothing. Just make sure to wash it in cold water and air dry it to prevent the paint from cracking or peeling.
Different Watercolor Techniques
Once you’ve mastered the basics of watercolor painting on fabric, you can start to experiment with different techniques. Here are a few that you can try:
- Splattering: Dip your brush in paint and then flick it onto the fabric to create a splatter effect.
- Layering: Allow one color to dry completely before adding another color on top.
- Blending: Wet two colors side by side and then blend them together with a wet brush.
- Dry brushing: Load your brush with paint and then blot it on a paper towel until most of the paint is gone. Use the dry brush to add color to your fabric.
- Resist painting: Use a resist medium such as wax or gel to create patterns on your fabric. Paint over the resist with watercolors to reveal the design.
- Painting with stencils: Use a stencil to add shapes and patterns to your fabric. Apply paint around the edges of the stencil for best results. [3]
Painting Wet-on-Wet and Wet-on-Dry
One of the great things about watercolor painting is that you can achieve different effects depending on whether you paint wet-on-wet or wet-on-dry.
Painting wet-on-wet means painting onto a wet surface. This technique is often used to create soft, blurry edges and to blend colors together.
To paint wet-on-wet, simply wet your fabric with a spray bottle and then start painting. The paint will spread out and blend together as it dries.
Painting wet-on-dry means painting onto a dry surface. This technique is often used to create sharp, defined lines and edges. [4]
To paint wet-on-dry, simply start painting on your dry fabric. The paint will stay put and won’t spread out as it dries.
Working From Light to Dark
When painting with watercolors, it’s important to work from light to dark. This means starting with the lightest colors and then gradually adding in darker colors.
So, when starting a new painting, always begin with the lightest colors and then add in darker colors as needed.
Layering of Colors
One of the great things about watercolor painting is that you can achieve different effects by layering colors.
Layering means adding one color on top of another. When you layer colors, the bottom color will peek through the top color and create a new color.
For example, if you layer blue over yellow, you’ll get green. If you layer red over blue, you’ll get purple. And so on.
Layering is a great way to add depth and interest to your paintings. So, don’t be afraid to experiment with it!
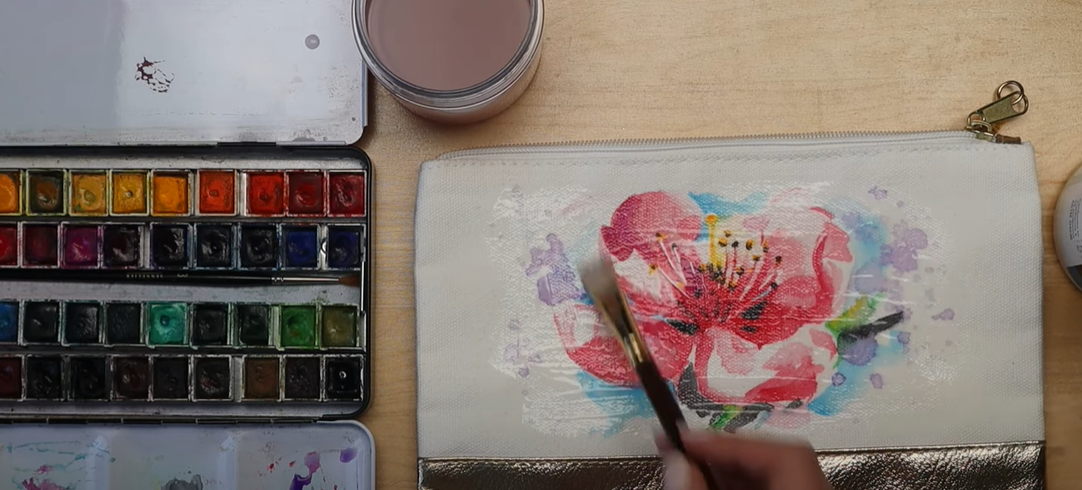
Splattering Watercolors
Splattering is a fun and easy way to add texture and interest to your watercolor paintings.
To splatter, simply dip your brush in paint and then flick it onto the paper or fabric. The paint will splatter and create a unique design.
You can also use a toothbrush to splatter paint. Simply dip the bristles in paint and then run your finger over them to make the paint splatter.
Ombre Effect
To create an ombre effect with watercolors, start by sketching your design on fabric with a water-soluble pencil. Next, mix together light and dark shades of the same color. Begin painting at the top of your design with the lightest shade, and then gradually add more dark paint as you move down the fabric. You can also create an ombre effect by dipping just the tips of your brush in paint and then lightly tapping them onto the fabric.
Tie-Dyed Effect
The tie-dye effect is a great way to add color and interest to your watercolor paintings.
To create a tie-dye effect, simply paint with two colors side by side. The colors will blend together in the middle and create a third color.
For example, if you paint blue and yellow next to each other, you’ll get green in the middle. If you paint red and blue next to each other, you’ll get purple in the middle. And so on.
Tie-dye effects are easy to create and add a lot of interest to your paintings. So, don’t be afraid to experiment with them!
Muted+Well Blended Effect
- Pre-wet your fabric with a spray bottle before adding any paint to prevent the colors from bleeding too much.
- Add a small amount of each color you want to use onto a plate or palette, then use a damp brush to pick up the colors and apply them to your fabric.
- Work in small sections and build up the colors gradually for a more muted, well blended effect.
- Once you’re happy with the result, set the paint by ironing your fabric on the reverse side (without steam) or allow it to air dry completely before laundering.
FAQ
Do watercolors stain clothes?
Watercolors can permanently stain clothing, so it’s important to take precautions to protect your clothes while you’re painting. Wear old clothes that you don’t mind getting paint on, and lay down a drop cloth or newspaper to catch any drips.
Can watercolor be washed out?
Watercolor paint is permanent once it dries, but you can usually remove it from non-porous surfaces like glass or metal with warm soapy water before it dries. Once it dries, however, watercolor paint is very difficult to remove.
How do you remove dried watercolor from fabric?
There are a few ways that you can remove dried watercolor from fabric. One way is to use a damp cloth to gently rub the dried paint away. Another way is to use a sewing needle or other sharp object to scrape the dried paint away. You can also try rubbing alcohol or hairspray to loosen the dried paint before attempting to remove it.
What is dry brush watercolor technique?
Dry brush watercolor technique is a painting technique where you use a dry brush to apply paint to your surface. This technique can be used to create a variety of effects, from textured backgrounds to delicate line work. Dry brush watercolor technique is easy to learn and can be used to create beautiful paintings.

What is a flat wash in watercolor?
A flat wash is a watercolor painting technique where you use a wet brush to apply a single color of paint to your surface. This technique is used to create a smooth, even layer of color. Flat washes are easy to create and can be used to add background colors or details to your paintings. [5]
How do you get crispy edges in watercolor?
Crispy edges in watercolor are created by painting wet paint into dry paint. This technique is often used to create sharp lines or details in a painting. To create crispy edges, simply paint wet paint into dry paint on your surface. The wet paint will push the dry paint out of the way and create a crisp, clean line.
Useful Video: Can you paint watercolor on fabric?
Conclusion
Watercolor is a wonderfully versatile medium, and fabric is a great substrate to work on. There are many methods of applying watercolors to fabric, and the best one for you will depend on the effect you’re looking for and the materials you have on hand. Experiment with different techniques until you find a method that works best for you. With a little practice, you’ll be able to create beautiful fabrics that can be used in quilts, garments, home decor projects, and more.
References
- https://www.essentialchemicalindustry.org/materials-and-applications/paints.html
- https://family.lovetoknow.com/crafts/heat-setting-fabric-paint
- https://www.craftsy.com/post/watercolor-techniques-you-have-to-try/
- https://www.watercoloraffair.com/watercolor-wet-on-wet-vs-wet-on-dry-tutorial-tips-tricks/\
- https://www.virtualartacademy.com/watercolor-technique-flat-wash/